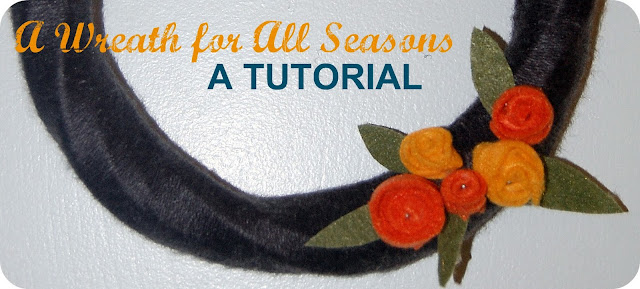
I've never written a tutorial for anything, mostly because I've never made anything worthy of one. However, I need to get in some practice in both being uniquely creative and writing tutorials for an upcoming endeavor, so here's my first attempt. If you try and make one of these wreaths, or something similar let me know if my instructions were helpful, clear, or just plain crazy. Thanks!
I have an empty living room, a complete blank slate for furniture, decorating, everything. In my mind I forsee it being done in super neutral colors with possibly a gray/white palette with lots of natural wood. I want it to be neutral so that I can change the feel of the room with the seasons, the holidays and my random whims with just a few additions of color or decor. I say all that to explain my inspiration for this wreath.
~~~~~~~~~~~~~~~~~~~~~~~~~~~~~~~~~~~~~~~~~~~~~~~~~~~~~~~~~~~~~~~~~~~~~~~~~~~~~~~~
Start with a plain wreath. I prefer to hit the dollar store for something like this. A Styrofoam wreath would probably be easiest, but I like the texture the wicker wreath gives to the finished project.
Take a ball of yarn and wrap the end around your wreath tying a tight knot but leaving a few inches of extra yarn hanging from the end. (You will use this later to create a hanging loop.)
Begin wrapping the yarn around the wreath tightly, lying each strand around snuggled up against the previous strand. After a few minutes you'll think this was a horrible project to begin. Then a few minutes later you'll settle into the mindless monotony of it and it's not so bad. Turn on a movie, listen to the radio, take it in the car...when someone else is driving.... or just sit on the couch with three sick sleeping children and it won't take too long.
When you get to the end, secure it to the string you left hanging at the beginning with a tight knot or two. Create a loop anyway you like......but what I did was to cut the end of the yarn to the same length as the beginning strand. I then took both pieces of yarn, made a loop and knotted them tightly right at the back of the wreath. So, I'm left with a double thick string to hang on and the knot is hidden right at the base of the loop behind the wreath.
Here's what you have now.....
Now to the fun part, where your creativity takes over. Decorate your wreath anyway you like! For my fall version I took felt in orange and yellow to create rosettes. Now I wish I could show you how to make perfect little flowers every time, but that part was an experiment for me as well. I took small strips of yellow and orange felt, about 1/2 inch wide and varying from 3-5 inches long. Then I wrapped them around themselves, twisting the felt every so often and hot gluing as I went. No real scientific process, just experiment as you go. Then I cut out leaf shapes from green felt. You could glue the leaves to the flowers, but I opted not to.
If you are certain that you want your wreath to always have the same pattern/color scheme/design then go ahead and glue your decor right on to the wreath. If you're like me and plan to change it up every so often then just attach the flowers with pins. This is where a Styrofoam wreath would come in handy. I had to wiggle my pins around to find a space to push them in deep enough and even still they sort of pop out and show in a few places, but I kind of liked the way that looked.
There you go. Hang it on your door, your fireplace, in your lovely living room, or on a random off-centered nail in the dining room where it doesn't match at all.......oh wait, that's where I hung mine.


No comments:
Post a Comment